In short, yes, corn on the cob can be frozen to extend its shelf life without compromising its flavor, color, or texture. For the best result when freezing fresh corn, it is necessary to blanch the corn first.
Corn on the cob, also known as maize or sweet corn, is delicious grilled on a barbecue or boiled and buttered.
Fresh corn removed from the cob is incredibly versatile for use in delicious recipes for sweet and savory dishes. From salad, stir-fry, soup, chowder, curry, pie filling, and casseroles to bread, muffins, omelets, and salsa served with corn chips, it can be used in almost anything.
As with all fresh produce, summer corn starts to deteriorate soon after it has been harvested. Freezing corn on the cob is a great way to extend the shelf life of the vegetable for year round use.
There are, however, a few steps you should take in preparing corn cobs for freezing to ensure the best preservation of the flavor, color, and texture over a long period.
Here is everything you need to know to successfully freeze corn on the cob.
Can Corn on the Cob Be Frozen?
Yes, corn on the cob can be frozen to extend its shelf life without compromising its flavor, color, or texture. For the best result when freezing fresh corn, it is necessary to blanch the corn first.
Blanching involves scalding, but not cooking, the corn in boiling water for a short period. Blanching stops the naturally occurring ripening enzymatic activity that eventually causes fresh produce to decay.
Although the enzymatic activity slows down during freezing, the enzymes still continue to function. If not blanched, frozen corn on the cob will have a less vibrant color, poor texture, and less sweet taste.
Unblanched corn can still be used but won’t last longer than 2 months in the freezer and the quality will not be as good. It may, therefore, be better to use unblanched corn in recipes where it will be blended with a variety of other ingredients such as soups, stews, and casseroles.
How To Freeze Corn on the Cob
Step 1: Clean
If the corn cob has not yet been cleaned, it is important to shuck the corn thoroughly. Trim the ends and remove the surrounding husk. Be sure to remove any silky strands completely.
Step 2: Wash
Fill a large pot of water and wash the corn well to remove any dirt or remaining strands.
Step 3: Blanch Corn
Boil clean water in a large stock pot. Do not add salt to the water as this may toughen the corn. You can, however, add a tablespoon of sugar for a slightly sweeter end-product. Fill a separate large bowl or sink with ice water.
Add the corn to the boiling water. Start timing only once the water is boiling. The size of the corn will determine the cook time.
Smaller ears of corn, or corn cobs that have been cut in half should boil for 5 to 7 minutes, while large whole ears of corn should blanch around 9 minutes. You do not want the corn to cook through.
Once 5 to 9 minutes have elapsed, immediately remove the corn from the boiling water and submerge it into the ice bath to stop the cooking process. If the corn cooks through and is not immediately cooled, it may become mushy, bland, and pale once thawed.
Step 4: Cool and Dry
Once the corn has cooled completely remove it from the ice bath and place it on a paper towel lined baking sheet to drain. Dry each ear of corn with a clean kitchen towel. Excess moisture will result in the formation of large ice crystals on freezing. This will cause freezer burn which affects the flavor and texture of the corn.
If you prefer to freeze the kernels of corn off the cob, take a sharp knife and shave the kernels off the cob on a cutting board. This will shorten the thawing time and also make it easier to use the corn after freezing.
However, if you are not sure whether you would like to cook the whole cob or use kernels only, it is best to freeze the corn on the cob.
Step 5: Wrap
Wrap the dry, cooled corn in plastic wrap or aluminum foil. Make sure that the corn is completely covered with no gaps where air can enter.This will help prevent freezer burn.
Step 6: Pack
Place the wrapped corn in a freezer safe bag. Press out as much air as possible before sealing the freezer bag. If you are going to freeze corn kernels only, scoop them into resealable freezer bags and press out all the air before sealing the top of the bag.
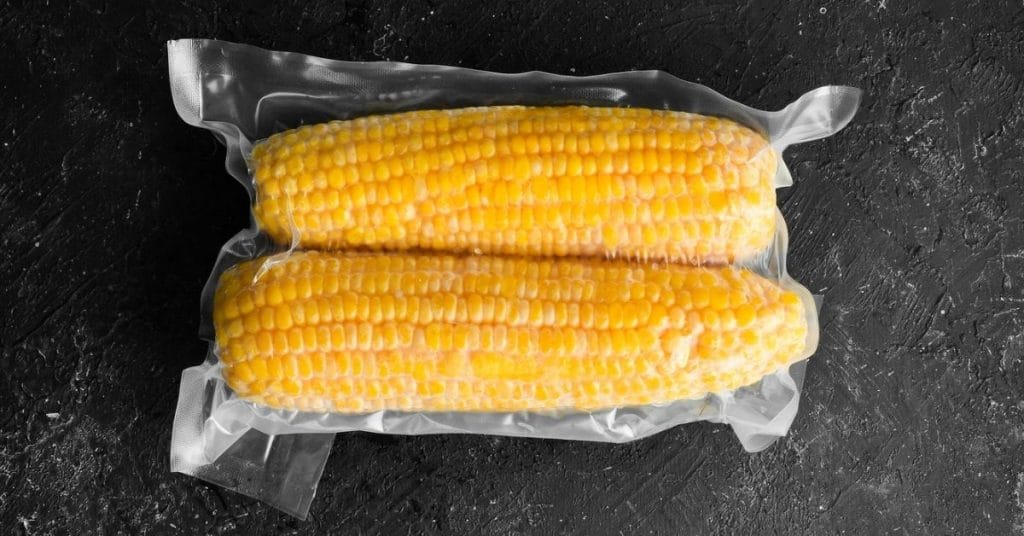
If you have a vacuum sealer, you don’t need to wrap them. Simply place the corn in vacuum seal bags, vacuum out the excess air and seal. This is a good way to avoid using excess plastic wrap.
Step 7: Label and Freeze
Label the bag with the date of freezing and contents and place it in the freezer.
How To Thaw Frozen Corn on the Cob
Corn on the cob as well as corn kernels do not need to be thawed before cooking and are practically ready to use. Simply remove the frozen cobs from the wrapping or freezer bags and boil for a few minutes (around 3 to 5 minutes) in a large pot. Alternatively bake them in the oven, grill them on a barbecue, or place them straight into an instant pot with your other ingredients.
You can also cook frozen corn in the microwave on medium heat, preferably covered in plastic wrap to prevent drying out.
If you want to use frozen corn in a batter, let the corn defrost in the refrigerator and drain off any excess liquid before adding it. The excess moisture may change the consistency of the batter if you don’t do this.
Corn kernels can be added frozen or thawed to soups, corn chowder, stews, and stir fry.
Types of Corn You Can Freeze
Corn on the cob generally refers to a cooked ear of fresh corn. Fresh sweet corn is the most popular variety of maize eaten directly off the cob. The leafy husk surrounding each ear of corn is not edible and is removed before serving or cooking.
Corn is at its sweetest if cooked and eaten on the same day it was harvested. After the first day of harvesting, the corn already loses 25% of its sweetness as the sugars convert into starch.
Corn can be cooked on the cob, or the kernels can be removed from the cob before or after cooking. The most common way to cook corn is by boiling, oven roasting, grilling, microwaving, frying, or on a barbecue grill.
When grilled on the barbecue, corn can be cooked in the husk, and the leaves removed just before serving. Simply served with a slather of butter, salt, and pepper, corn is delicious on its own. Alternatively, it can be added to a variety of dishes, casseroles, batters, and soups.
See more: how to reheat corn on the cob
FAQs
Conclusion
Being so versatile, healthy, and filling, corn is a great ingredient to have on hand for a super easy snack, side dish, or meal-enhancer. Whether whole corn, husked, or loose kernels, corn can be frozen to extend its shelf life and lock in some of its sweetness.
Whether you get your whole cobs from your garden, the farmers market, or grocery store, the sooner you freeze them after harvesting, the better the quality will remain. Freezer corn can be used in most corn recipes from stir fry and soup to muffins, omelets, quiche, stews, and salsa with tortilla chips. Save yourself on food waste, time, and money by keeping a stash of these delicious golden veggies in the freezer.
Don’t forget to explore our blog to learn more how to freeze cornbread.
*Image by yarunivphoto/depositphotos
