In a nutshell: There are two methods to dry garlic: oven-drying sliced or minced garlic and curing garlic bulbs whole. Both methods require peeling and sorting the garlic cloves before drying them.
Garlic plants are part of the onion family. The bulbs are widely used in cooking and for medicinal purposes. Its pungent flavor needs to be used with caution since too much garlic can overpower a dish quickly.
Since a little goes a long way, you can easily end up with more garlic than you need. To preserve garlic and prolong its shelf-life you can dry it to use in almost any savory dish, sauce, dressing, or dip. Follow this guide to successfully dry your own garlic at home.
Can Garlic Be Dried
Yes, you can dry garlic either minced or sliced. Curing garlic is another way you can preserve the bulbs whole. If you grow garlic in your own vegetable garden, stop watering the plants a few days before harvesting. Once you harvest garlic, it is best not to wash the homegrown garlic since you want to keep them as dry as possible.
Moisture may result in the growth of mold. If the garlic bulbs have a lot of remaining dirt that cannot be cleaned off with a dry cloth, simply peel off one or two layers of the outer skin to get them clean. Keep the roots and leaves attached.
Garlic is prone to sprouting especially when in a humid environment. It will start to develop seed heads causing it to soften. This is another reason to keep it dry, even a few days before harvesting garlic.
How to Dry Garlic
Drying freshly harvested garlic is very easy. Follow the steps below:
Method 1: Oven-drying Sliced or Minced Garlic
Step 1: Peel and Sort
Peel the garlic cloves by removing the papery skin as well as the individual film around each clove. Discard or compost the papery skins. Sort through the peeled cloves and remove any damaged ones.
Step 2: Chop
Using a sharp knife, slice the cloves into thin slithers. You can also place the peeled garlic cloves in a blender and pulse 2 to 3 times to chop them into small pieces. If you are chopping the garlic in the blender do not pulse too many times as it will turn into a paste.
Step 3: Bake
Preheat the oven to its lowest temperature setting. This should be around 170°F (76°C) or lower.
Spread the garlic out on a baking sheet lined with parchment paper. Arrange the pieces in a single layer so they are not clumped together.
Bake for 30 minutes, stirring the pieces occasionally to ensure even drying. Remove the tray after 30 minutes and let the garlic cool. If it is completely dry the pieces will easily crumble or snap when pressure is applied with your fingers. If they are not yet dry, repeat the process, checking on them occasionally to prevent them from burning.
Step 4: Store Dried Garlic
Keep the dried, cooled garlic in airtight containers. Always store garlic in a cool, dry place out of direct sunlight. You can also freeze garlic to further extend its shelf-life up to one year.
To make your own garlic powder, grind the pieces of dried garlic in a spice grinder or food processor straight after they have cooled. With a fine sieve, separate any large pieces that have not completely broken down.
Tip: You can also use a dehydrator to dry the chopped garlic. Set your device to 115°F (45°C) and dry for up to 48 hours.
Method 2: Cure Garlic Bulbs Whole
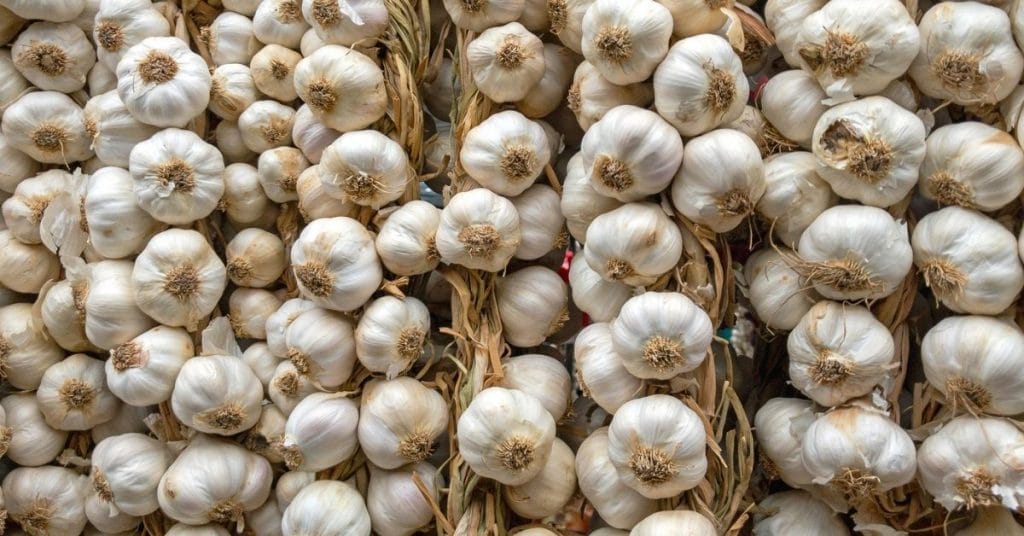
Drying whole garlic bulbs is best if you live in a dry, warm climate. High humidity can cause mold and ruin the entire batch. Here’s how to hang garlic to dry:
Step 1: Harvest and Hang
Once harvested, leave the garlic roots and stems on. Choose a warm area with low humidity and good air circulation. Ideally, the cloves should not be in direct sunlight.
Either hang the garlic in small bunches from a beam or arrange them in a single layer on a rack or net to allow good ventilation all around the plant.
Leave the bulbs for a few weeks to dry. If they are placed outside, make sure there is no moisture in the air or dew during the night. In this case, keeping them in an indoor space will be a better option.
Note that larger cloves need longer to complete the curing process. Elephant garlic, for example, will take at least four weeks. Depending on the climate and size, it can take up to two months until the garlic is cured.
When they turn brown and the outer wrapper is shrunken and papery the garlic should be completely cured.
Step 2: Trim
When the leaves and roots are papery, shriveled, and brown, trim the roots close to the bulb. Cut the top stems off, leaving an inch of the stem on the bulb. Do not remove the skins as these protect the cloves.
Step 3: Store
Store the cured garlic in a cool, dry place such as a pantry, cupboard, or shed. The area should be free from moisture and humidity.
Types of Garlic
Garlic is used as a spice or flavor enhancer in cooking worldwide. It is especially known to form a part of the flavor profiles of Asian, Middle Eastern, and Southern European cuisine. There are hundreds of garlic strains that can be divided into two main groups:
Softneck Garlic
Softneck garlic is divided into two categories namely artichoke and silverskins. These types of garlic have many overlapping layers of white to off-white outer skin containing up to 20 cloves.
They have a long storage life of up to 8 months if kept unbroken as a whole garlic bulb. Once the cloves are separated the shelf-life significantly decreases.
Hardneck Garlic
Hardneck garlic has easy-to-peel loose skins and a more intense flavor. They have a shorter storage life of four to five months and often grow a flowering stem that becomes hard and dry.
FAQ
How long does garlic last?
Dried garlic powder will last for 2 months if stored in an airtight container in a cool dry place out of direct sunlight. Dried garlic pieces and whole bulbs will last up to a year if stored correctly. The flavor intensity will decline over time so it is best to use it within a few months to get the best quality.
Can garlic be dried in the microwave?
Yes, garlic can be dried in the microwave although it may lose some of its flavor intensity due to the high heat. Prepare and chop the garlic. Place the small pieces in a single layer on a paper towel on a microwave-friendly plate. Make sure they are spread out and do not clump together. Cover with another layer of paper towel. Place it in the microwave for 60 seconds. Check the garlic and microwave again in 30-second increments until it is dried and crispy.
How can you use garlic after drying?
Dried garlic can be used as you would fresh garlic during cooking, however, garlic powder can also be used to sprinkle over pizza, pasta, omelets, vegetables, and salads. Mix the garlic powder or pieces with a combination of pepper flakes, onion powder, and chili powder to create seasonings and rubs.
How do you dehydrate garlic naturally?
To dehydrate garlic naturally, separate the cloves and peel them. Then slice the garlic into thin, even pieces and place them on a wire rack or a mesh screen in a well-ventilated area with good air circulation. Allow the garlic slices to dry for several days until they are completely crispy and brittle, and store them in an airtight container.
Conclusion
Whether you are making sauces, soups, dips, dressings, stew, stir-fry, curry, or flavored oils, garlic adds a big punch of flavor to all types of savory dishes. Fresh garlic is pungent and needs to be used in small amounts.
If you have a lot of garlic that needs to be preserved, prevent any going to waste by drying it. The safest way to do this is by using an oven or dehydrator. This way you avoid the risk of mold forming as well as losing too much flavor intensity. Dry your own garlic at home and keep your seasonings preservative-free.
As a qualified Holistic Nutritionist, Helga has also combined her passion for good food and healthy living in wellness coaching. After years practicing in the catering and hospitality industries, Helga now focuses on sharing her knowledge and experience with others through writing about food tips, cooking advice, wellness, global food trends, and travel.