In short, there are seven steps to dry sunflower seeds: prepare for harvest, replace the cover, cut and hang, harvest remaining seeds, clean, salt soak (optional), and roast.
Sunflowers beautifully resemble the sun with their big bright yellow petals. The unique, tall-standing flowers are not only gorgeous to look at, but they produce a large amount of healthy, edible seeds.
These versatile seeds can be used in baking, salads, turned into oil, spreads, and eaten alone as a snack.
If you live in a moderately warm climate, sunflowers can be easy to grow in your own garden. In this guide, you will learn everything you need to know about drying your own sunflower seeds.
Can Sunflower Seeds Be Dried?
Yes, dried sunflower seeds make a great snack and are useful in cooking. You can also save sunflower seeds for planting specifically. To get the best quality out of the dried seeds, it is important to harvest them at the right time and in the right way.
Harvesting sunflower seeds too early will result in inedible white seeds, whereas a late harvest will yield desiccated seeds that are not suitable for roasting.
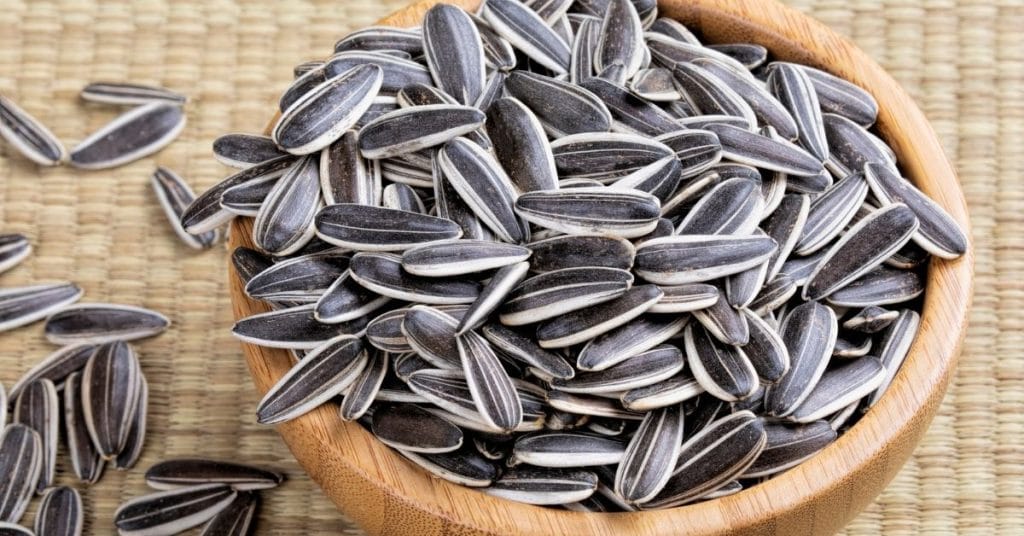
Sunflower seeds are ready to harvest when they show the typical black-on-white exterior stripes. The seeds are their plumpest when the flower head starts to wilt, petals fall off and the stem turns yellow or slightly brown.
The Art Of Drying Sunflower Seeds
Step 1: Prepare for Harvest – Cover
If you live in a dry sunny climate, leave the sunflowers on the stem for the first stage of drying. If you are in a humid climate, drying them off the stem may be better to prevent mold.
The sunflower head will begin to droop, petals will fall off, and the seeds should start to plump up. The wilted head of the sunflower with few petals left is very appealing for birds, squirrels, and other animals to snack on.
To protect the seeds, cover the head of the sunflower with a brown paper bag or cheesecloth. Tie it loosely with string to prevent it from being knocked off. Do not use a plastic bag as this will prevent sufficient airflow and the seed heads will rot.
Step 2: Replace the Cover
If the bags get wet or tear, replace them with new dry brown paper bags. Be careful when removing the covering as some seeds may have started to drop off.
Collect any loose seeds that have dropped into the old paper bag. Store seeds in an airtight container until the full harvest is ready for drying.
In the case of rain, you may cover the sunflowers with plastic just to prevent them from getting wet. Do not tie the plastic and remove it as soon as the rain clears.
Step 3: Cut and Hang
The back of the head will turn yellow-brown within a few days of wilting. Leaving the bags on, cut the stems 1 ft (30 cm) below the flower. Be careful not to lose falling seeds during the process if the paper bags slip off accidentally.
Choose a warm dry area to continue the drying process. This can be indoors as long as there is good air ventilation to prevent moisture build-up. Tie the stems with string and hang the sunflower heads upside down from a hook or beam.
Check them on a daily basis to collect sunflower seeds that have dropped off in the bag. Store the seeds in an air-tight container until all the seeds have been harvested.
Step 4: Harvest Remaining Seeds
After 1 to 4 days, the head will finish drying. It will turn dark brown and dry. Untie the hanging stems. Be careful to keep the bags on as you will lose plenty of seeds if they fall off.
Place the sunflowers on a table or counter and carefully remove the bag. Gather all the seeds that have fallen off. Brush the dried head of the flower with your hands or a brush to remove the leftover seeds until they are all dislodged.
Step 5: Clean
Place all the seeds you have stored and harvested in a bowl. Rinse the seeds thoroughly with cold water to remove dirt and bacteria. Drain them through a sieve or colander.
Spread the sunflower seeds out in a single layer on a few sheets of paper towel to dry for a couple of hours. Remove any damaged bits or debris.
Step 6: Salt Soak (Optional)
Prepare a mixture of 2 quarts (2l) water and ¼ to ½ a cup salt and soak the seeds overnight. Alternatively, you can boil the seeds in the solution for 2 hours as a quicker method.
Drain the seeds and spread them out to dry in a single layer on paper towels.
Step 6: Roast
Whether you have unsalted seeds or have salt-soaked the seeds, make sure they dry completely before roasting.
Spread them onto a shallow baking sheet in a single layer so that they do not lie on top of each other. Roast them for 30 to 40 minutes or until lightly browned at 300 °F (149 °C). Stir occasionally to allow even drying.
Step 7: Cool and Store
Remove the roasted sunflower seeds from the oven and let them cool completely for 30 to 40 minutes.
Place them in an airtight container or resealable bag and store them in the refrigerator.
FAQs
How long do sunflower seeds last?
Raw sunflower seeds will last for 2 to 3 months if kept in a cool, dry place in airtight containers. Roasted seeds in the shell will last 4 to 5 months in the pantry or refrigerator and up to 1 year in the freezer. If the seeds have been shelled after roasting, they will last for 3 to 4 months in the pantry or refrigerator and up to 1 year in the freezer.
Can you eat raw sunflower seeds?
Yes, sunflower seeds can be eaten raw, or roasted. They do, however, need to be shelled before eating.
Why are my sunflower seeds white?
White sunflower seeds are not yet mature. Only once, the seeds are plump with black and white stripes as they mature and ready for harvesting.
How do you dry sunflowers quickly?
To dry sunflowers quickly, cut the flower heads from the plant just before the seeds are fully matured and hang them upside down in a well-ventilated and warm area. You can also use a food dehydrator set to a low temperature for faster and more controlled drying.
Conclusion
Saving sunflower seeds is a great way to save money and prevent waste. You can use the seeds to make sunflower seed spread, sunflower oil, in baked goods, salads, cooked dishes, and eaten as a tasty snack with dried fruits and nuts. They provide a fantastic nutty flavor and crunchy texture.
One sunflower can yield between 1000 and 2000 seeds. Of course, you may lose some when harvesting sunflower seeds if you are not careful when handling the flower heads.
Keep the seed head in dry, warm conditions during the harvesting and drying period for best results. Always store them in air-tight containers to prevent rancidity.
Enjoy this fantastic healthy snack and spruce up any soup, stir-fry, sandwich, vegetable, or salad dish with your home-roasted sunflower nuggets.
As a qualified Holistic Nutritionist, Helga has also combined her passion for good food and healthy living in wellness coaching. After years practicing in the catering and hospitality industries, Helga now focuses on sharing her knowledge and experience with others through writing about food tips, cooking advice, wellness, global food trends, and travel.