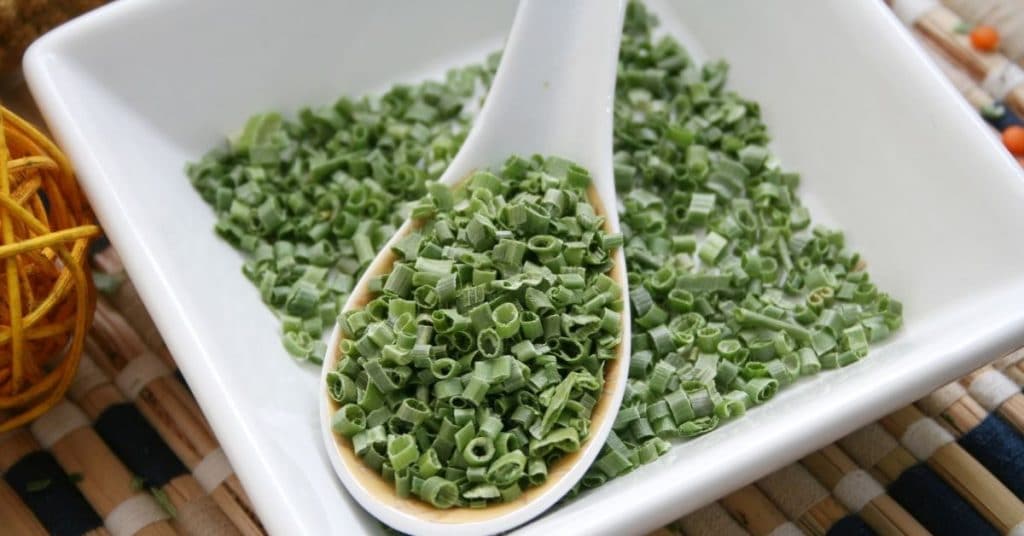
In a nutshell: There are three methods to dry chives: air-drying by hanging, oven-drying, and using a food dehydrator. All methods require cleaning and chopping the chives before drying them.
The long green stems and flowers characteristic of chives makes them both a flavorful and colorful addition to meals.
Fresh chives will last 10 to 14 days in the refrigerator before they start to wilt and turn slightly slimy. To avoid wasting these delicious herbs you can dry them.
Although you can use dried chives for up to two years, dried chives lose their flavor slowly after six to 12 months. Once the aroma is lost, it’s time for a new batch.
Here is your full guide to successfully drying chives for the best flavor preservation.
Types of Chives
Chives are closely related to common onions, garlic, shallots, and leeks. Their flavor is, however, milder which makes them great in culinary uses as a fresh ingredient, cooked, or dried. The green stalks, also known as scapes, as well as the flowers, are both edible.
The light purple flowers have a mild onion flavor whilst Chinese chives (also called garlic chives) have white flowers with a very strong garlic flavor. The flowers can be tossed into salads or used as a garnish.
The most commonly used part of the chive is its long green leaves. These are diced and used as a garnish, flavor enhancer in soups, stews, dressings, and dips, as well as a popular addition to potato, egg, and fish dishes.
Can You Dry Chives?
Yes, you can dry chives and keep them for up to 2 years to spice up your cooking. A warm, dry climate provides the ideal conditions for drying herbs.
If you live in a very humid area, it is best to use a heat-drying method such as the oven or a dehydrator to dry chives. You might also be better off freezing chives to preserve them.
Humidity and moisture in the air can lead to mold forming before the chives dry completely.
Air-drying chives by hanging is the most time-consuming dehydration method and can take up to two weeks. This method is, however, the best way to preserve the flavor.
Once dehydrated and packed into airtight containers, store chives in a cool, dry place away from direct sun.
How To Dry Chives
Preparation
The best time to harvest chives from your herb garden is in the early morning, once the dew has dried. Like other fresh herbs, this is when the flavor is most concentrated.
Before you start the dehydration process, rinse the leaves under cool water and pat dry with clean paper towels. You can also dry them with a salad spinner. Leave them for a few minutes to air dry further.
It is essential to remove excess moisture from washing before you start the dehydration process.
Discard any dead or withered chives and any parts that are yellowed, brown, or moldy.
Option 1: Air-Dry Chives by Hanging
Step 1: Form Bundles
Gather a few long chive leaves into a loose bundle and tie them together at the base with a rubber band or piece of string. Don’t make the bundles too big to allow even airflow and drying.
Step 2: Hang
Place a brown paper bag over the chive bundle so you can hang the chives upside down. Cut small holes in the bag to allow good air circulation while protecting the herbs from dust and discoloration. Do not use plastic bags as this will not allow sufficient airflow and will trap moisture.
Choose a place with good light and air circulation to hang the bundles. Avoid areas that are moist such as spaces near a stove. Avoid drying the chives in direct sunlight as this will dull the green color.
The drying process can take up to 2 weeks depending on the climate. Check them every couple of days to ensure no mold is developing.
When the chive leaves are fully dry, brittle, and crumble easily when bent they are ready. If the chives are still pliable and do not break they need more time to dry.
Step 3: Pack
Take the dried herb bundles down and place the leaves on a piece of parchment paper or cutting board. Crumble the leaves with your fingers or cut them into small pieces with a knife.
Step 4: Store
Store dried chives in a glass jar or air tight container. Label it with the date and contents.
Option 2: Oven-Drying
Step 1: Preheat Oven
Preheat the oven to its lowest temperature setting around 185 °F (80 °C) or lower.
Step 2: Prepare Leaves
Cut the cleaned leaves with a sharp knife or pair of kitchen scissors into ¼ inch pieces (0.6 cm). Spread the chive pieces out in a single layer on a baking sheet lined with parchment paper.
Step 3: Bake
Place the chives in the oven and bake for one to two hours. Check the chives periodically to ensure they are not burning. The chives should be brittle and crumble between your fingers when they are completely dry.
Step 4: Store
Store the dried herbs in a glass jar or airtight container with a lid and label it with the date and contents.
Option 3: Food Dehydrator
To dry chives in a food dehydrator clean, chop, and spread them out on a dehydrator tray as you would with the oven-drying method. Place a rack over the top of the chives to prevent them from flying around during the drying process.
The chives should take approximately one hour to dry at 90 °F (32 °C) in your dehydrator.
FAQs
How long do dried chives last?
Properly dehydrated chives will last 1 to 3 years if kept in cool, dry conditions.
How long do frozen chives last?
As long as they remain consistently frozen, fresh chives will last four to six months in the freezer.
Can you dry chive flowers?
Yes. To dry chive flowers, cut them off the stems and place them on a flat surface or baking sheet. Leave the flowers to dry in a warm, dry area out of direct sunlight. Turn them every couple of days to ensure even drying all around. The flowers will take approximately 1 week to dry depending on the humidity and temperature.
Can chives be dried in the microwave?
Yes. Chives can be dried in the microwave, however, this is not the best way to preserve their flavor. Place chopped chives on a paper towel in a single layer. Place another paper towel on top to cover. Microwave on high heat for 20 seconds. Check the herbs and keep microwaving them in 10-second intervals until they are dry and brittle.
Are chives good dried?
Yes, chives can be dried, but they lose some of their delicate flavor and texture in the drying process. Fresh chives are generally preferred for their vibrant taste and appearance in dishes.
Conclusion
Chives add a lovely garlic-onion flavor to dishes without being overpowering. They are versatile as a garnish, used in omelets, salads, dips, dressings, chive butter, and potato salads, as well as in cooked dishes such as stews, sauces, soups, and casseroles.
Before storing dried chives or chive blossoms, always make sure they are completely dehydrated. If there is any moisture present in the herb, mold will develop even if stored in an airtight container.
Keep your herbs in a cool, dry place out of direct sun, and you’ll have great flavor handy in your pantry for a whopping 2 years! You can also freeze chives to preserve them.
As a qualified Holistic Nutritionist, Helga has also combined her passion for good food and healthy living in wellness coaching. After years practicing in the catering and hospitality industries, Helga now focuses on sharing her knowledge and experience with others through writing about food tips, cooking advice, wellness, global food trends, and travel.